Most Instagram influencer campaigns don’t fail because of a bad product or the wrong niche. They fail because the team missed something obvious — a brief that was too vague, a creator whose audience didn’t match the target market, a tracking link that was never set up properly. Then the campaign ends, the budget is spent, and no one can figure out what worked.
A solid campaign checklist fixes that. Not by adding bureaucracy, but by giving everyone on the team a shared map of what needs to happen and when.
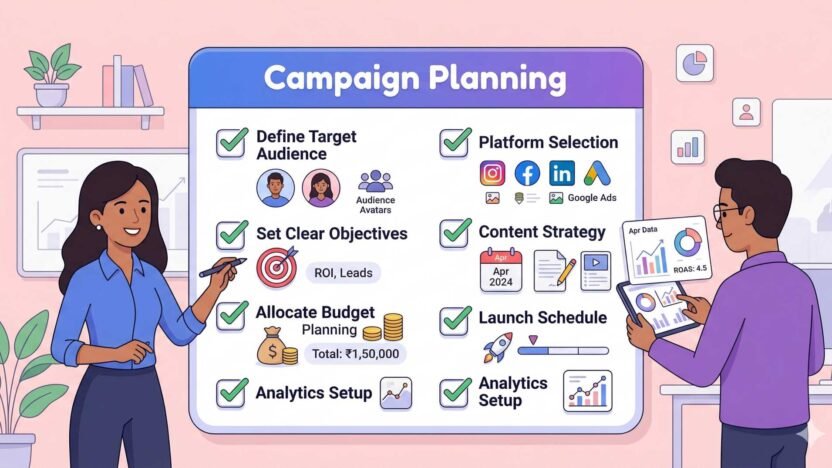
Instagram Influencer Marketing Campaign Checklist
This guide is that map — built for 2026, when influencer marketing has gotten more sophisticated (and more competitive) than ever. We’ll walk through every phase: strategy, creator selection, outreach, content briefing, approvals, launch, tracking, and reporting. Whether you’re running your first campaign or your fiftieth, there’s something here worth double-checking.
| Quick stat: Influencer marketing spend globally crossed $24 billion in 2024 and is projected to grow further through 2026. Instagram remains the top platform for brand-influencer collaborations, with Reels driving the highest engagement rates. |
Before we dive in, a note on tools: managing all of this manually — spreadsheets, DMs, shared drives — gets messy fast. If you want to see how a dedicated platform handles the chaos, this breakdown of influencer campaign management tools is worth reading first.
Phase 1: Campaign Strategy and Goal Setting
Everything downstream depends on getting this part right. A campaign without clear goals is just paid content.
1.1 Define What You Actually Want From This Campaign
Before you touch a budget or reach out to a single creator, write down your primary goal in one sentence. Not three goals, not a list — one. Instagram influencer campaigns can do a lot of things, but they do one thing best.
| Campaign Goal | Primary Metric | Best Creator Type |
| Brand Awareness | Reach, Impressions, Story Views | Macro / Mega Influencers |
| Product Launch | Story Swipe-ups, Link Clicks, Views | Mid-tier + Niche Creators |
| Direct Sales / Conversions | Promo Code Redemptions, Sales | Micro Influencers |
| Community Building | Comments, Shares, Saves | Nano + Micro Influencers |
| Content Generation | Volume of Quality UGC | Any tier, content-first brief |
| App Downloads | Click-through Rate, Install Rate | Tech / Lifestyle Creators |
1.2 Set a Realistic Budget
Instagram influencer pricing in 2026 has standardized somewhat, but it’s still all over the place depending on niche, tier, and content type. Here’s a rough benchmark:
| Creator Tier | Follower Range | Avg. Feed Post Cost | Avg. Reel Cost |
| Nano | 1K – 10K | $50 – $300 | $100 – $500 |
| Micro | 10K – 100K | $300 – $2,000 | $500 – $3,000 |
| Mid-tier | 100K – 500K | $2,000 – $8,000 | $3,000 – $12,000 |
| Macro | 500K – 1M | $8,000 – $20,000 | $12,000 – $30,000 |
| Mega / Celebrity | 1M+ | $20,000+ | $30,000+ |
Note: Engagement rate often matters more than follower count. A micro influencer with 40K followers and 6% engagement will typically outperform a macro with 800K followers and 0.8% engagement for conversion-focused goals. Learn more about how to think through types of influencers and which tier fits your campaign.
1.3 Campaign Strategy Checklist — Phase 1
- Goal defined: One primary objective written out. Secondary goals noted separately.
- KPIs set: Reach, impressions, engagement rate, click-through rate, conversions, ROAS — pick the ones relevant to your goal.
- Budget allocated: Creator fees, production support (if any), platform/tool fees, paid amplification budget, contingency (10–15%).
- Timeline drafted: Campaign start date, content deadlines, approval windows, go-live date, campaign end date.
- Brand guidelines ready: Logo files, color palette, tone of voice doc, do’s and don’ts list.
- Legal reviewed: FTC/ASA disclosure requirements confirmed for your target markets.
Phase 2: Finding the Right Influencers
This is where most campaigns go wrong. Not because marketers aren’t trying hard enough, but because they optimize for the wrong signals — follower count, aesthetic, or pure gut feel.
2.1 Know Who You’re Actually Looking For
Before searching, write a creator profile. Include: audience demographics (age, gender, location), content style (educational, lifestyle, entertainment, product review), posting frequency, engagement rate floor (minimum 2% for macro, 4%+ for micro), and any hard exclusions (competitors, controversial content, etc.).
The full breakdown of how to find the right influencers for your brand covers this in depth — including what signals to look for beyond follower count.
2.2 Vet Every Creator Thoroughly
Follower counts lie. Or more accurately — they don’t tell the full story. Before shortlisting any creator, check:
- Audience authenticity: Look for sudden follower spikes, unusually low engagement relative to followers, generic comments (‘nice pic’, emojis only).
- Audience demographics: Use analytics tools to verify the creator’s audience matches your target market — especially location and age.
- Content quality and consistency: Scroll back three months. Has the quality been consistent? Do they go dark for weeks at a time?
- Brand safety: Check for anything that could create reputational risk — past controversies, competitor partnerships, political content that conflicts with your brand.
- Past sponsorship performance: Have they worked with similar brands before? How did those posts perform?
For audience-level vetting, influencer audience analytics tools can pull this data automatically — saving hours of manual profile review.
2.3 Build a Tiered Shortlist
Don’t approach just one creator per ‘slot’. Build a tiered list:
- Tier 1: Top 5 ideal creators. These are who you really want.
- Tier 2: Next 5–10 solid alternatives if Tier 1 declines or isn’t affordable.
- Tier 3: Backup options — lower cost, slightly off-brief, but workable.
This prevents the scramble that happens when your first choice says no two weeks before the campaign launch.
2.4 Influencer Discovery Checklist — Phase 2
- Creator profile written: Audience demo, content style, engagement floor, exclusions.
- Discovery method chosen: Platform search, influencer database, agency, or inbound applications.
- Audience authenticity checked: No major red flags on follower growth, comment quality, or engagement rate.
- Demographics verified: Creator’s audience matches your target customer profile.
- Brand safety audit done: Past six months of content reviewed.
- Tiered shortlist ready: Minimum 10 creators across three tiers before outreach begins.
- Media kit requested: Collected and reviewed for all Tier 1 creators.
Speaking of media kits — if creators send you something that’s outdated or missing key info, it’s worth knowing what a good Instagram media kit actually contains. Some creators also submit a broader influencer media kit that covers multiple platforms — useful for cross-platform campaigns.
Phase 3: Outreach and Negotiation
How you approach creators matters more than most brands realize. A generic copy-paste DM to 200 creators is not a strategy — it’s spam that burns bridges.
3.1 Personalize Your Initial Outreach
Your first message should show that you’ve actually looked at their content. Reference a specific post, a recurring theme, or something they talked about in a recent story. One sentence of genuine observation is worth more than three paragraphs of brand boilerplate.
Keep the initial message short. Introduce the brand, explain why you think they’re a good fit, and ask if they’re open to a collaboration. Do not send the full brief in the first message.
3.2 Outreach Channels in 2026
- Instagram DM: Still the most common for nano/micro. Response rates are decent but DMs can get buried.
- Email: Preferred for mid-tier and above. More professional, easier to track, better for attaching briefs later.
- Creator platforms / marketplaces: Useful for volume campaigns. Lower personalization but faster turnaround.
- Agent / manager: Required for macro and mega influencers. Go through their rep, not a personal DM.
3.3 Negotiation and Contracting
Once a creator expresses interest, move quickly. Good creators get multiple brand inquiries every week.
- Deliverables: Be specific. ‘1 Reel + 3 Stories with link sticker + 1 static feed post’ — not just ‘Instagram content’.
- Usage rights: Do you want to repurpose their content in paid ads? That costs extra and should be agreed upfront.
- Exclusivity: Are you asking them not to post competitor content for a period? Define the category and timeframe.
- Revisions: How many rounds of feedback are included? Clearly state this.
- Payment terms: 50% upfront, 50% on delivery is standard. Some creators require full payment upfront — decide your policy.
- FTC disclosure: Require compliance with local advertising disclosure laws. This must be in the contract, not just the brief.
3.4 Outreach and Contracting Checklist — Phase 3
- Personalized outreach sent: Not bulk copy-paste.
- Follow-up cadence set: Reminder scheduled if no response within 5–7 business days.
- Rate negotiation completed: Agreed deliverables, fee, and payment schedule.
- Contract signed: Both parties have signed. Key clauses: deliverables, deadlines, usage rights, exclusivity, FTC disclosure, kill fee.
- Usage rights documented: Scope of rights clearly stated if repurposing content.
- Payment processed (first installment): Creator feels secure before they start creating.
Phase 4: Content Briefing and Creative Direction
A bad brief costs you money twice — once when the creator makes the wrong content, and again in the revision rounds that eat everyone’s time.
4.1 What a Good Brief Actually Contains
There’s a big difference between a brand telling a creator what to do and giving them what they need to succeed. The best briefs are clear on the must-haves and loose on everything else.
| Brief Element | What to Include | Common Mistake |
| Campaign Background | What the brand is, what the product does, why this campaign is running now | Too much corporate history, not enough product context |
| Target Audience | Who you’re trying to reach — age, interest, problem they have | Being too broad (‘everyone 18-45’) |
| Key Message | The one thing the viewer should take away from this content | Listing five messages instead of one |
| Mandatory Inclusions | Product name, specific claims, CTA, disclosure language, link/code | Forgetting the CTA or making the code hard to remember |
| Creative Freedom | What the creator can decide themselves — format, tone, storytelling approach | Over-scripting and removing the creator’s voice |
| Approval Process | How many rounds, who approves, what the timeline is | Unclear approval chain leading to delays |
| Content Specs | Reel duration, Story dimensions, feed vs. carousel, caption length guidance | Leaving specs vague and getting wrong-format content |
4.2 The Do’s and Don’ts of Creative Direction
Creators know their audience better than you do. The whole point of influencer marketing — versus
running standard social media ads — is that the content feels native to the creator’s feed. Over-scripting kills that.
- DO: Give them the key message, mandatory mentions, and call-to-action.
- DO: Share brand guidelines so they understand your visual language.
- DO: Explain the WHY behind this campaign so they can be genuine.
- DON’T: Write them a word-for-word script (unless they’ve specifically asked for one).
- DON’T: Require they use certain hashtags that their audience would find strange.
- DON’T: Make approval so slow that they lose the momentum of their own content calendar.
4.3 Content Briefing Checklist — Phase 4
- Brief document completed: All sections filled out — background, audience, key message, must-haves, creative freedom, specs, deadlines.
- Brief reviewed by brand stakeholders: Legal, brand, and marketing all signed off on the brief before it’s sent.
- Brief sent and acknowledged: Creator confirms they’ve received and understood the brief.
- Questions from creator addressed: Any clarification questions resolved before content creation starts.
- Content submission deadline confirmed: Creator knows the date content must be submitted for review.
Phase 5: Content Review and Approvals
This phase is where campaigns bog down. Approval rounds get drawn out, deadlines slip, and creators get frustrated. Having a clear process upfront avoids most of this.
5.1 Set the Approval Rules Before Content Arrives
When you signed the contract, you should have agreed on how many revision rounds are included (usually one or two). Before the creator submits their first draft, confirm:
- Who on your team has approval authority? One person, not a committee.
- What’s the turnaround time once content is submitted? 24–48 hours is fair. More than 72 hours frustrates creators.
- What constitutes a mandatory revision vs. a preference? Mandatory = legal compliance, wrong product info, missing CTA. Preference = you’d like a different background color.
5.2 What to Check in Content Review
- Mandatory mentions: Product name, correct claim language, call-to-action, promo code/link.
- FTC/ASA disclosure: ‘#ad’ or ‘#sponsored’ visible in the first line of the caption, not buried.
- Brand safety: Nothing in the content that conflicts with brand values or creates legal risk.
- Factual accuracy: Any product claims are accurate. Don’t let a creator say something that isn’t true.
- Content specs: Correct dimensions, video length within Instagram limits, sound-on/off appropriate.
- Link/code accuracy: Test the tracking link before approving. Check the promo code works.
| Important: Never make creators post without written approval confirmation. If something goes wrong — wrong claim, disclosure missing — the brand is also liable. Keep a record of all approvals. |
5.3 Approval Checklist — Phase 5
- Content received by deadline: Or creator communicated a delay with revised timeline.
- Review completed within 48 hours: Feedback sent promptly so creator can revise.
- Revision requested clearly: Specific, actionable feedback — not vague.
- Final version approved in writing: Email or platform confirmation. No verbal-only approvals.
- Tracking link/code verified: Tested and confirmed working before go-live.
- Go-live date confirmed with creator: They know exactly when to post.
Phase 6: Campaign Launch and Coordination
Getting to launch without a stumble requires coordination — especially when you have multiple creators going live at different times.
6.1 Staggered vs. Simultaneous Launch
There’s no universally right answer here. The choice depends on your campaign goals:
| Launch Type | Best For | Watch Out For |
| Simultaneous | Creating a viral moment, product launch hype, short campaigns | Audience overlap if creators share followers |
| Staggered (rolling) | Long campaigns, testing and learning, budget pacing | Requires more coordination to track each wave |
| Sequential | Story-based campaigns where each creator builds on the last | Depends heavily on first creator’s performance |
6.2 Launch Day Checklist
- Creator reminders sent: A day before go-live, confirm the posting time with each creator.
- Tracking infrastructure confirmed live: UTM parameters, promo codes, landing pages all working.
- Monitoring set up: Someone on your team is watching mentions, comments, and metrics from the moment posts go live.
- Community management ready: If the content drives significant comments, someone should be responding on behalf of the brand — or briefing creators on how to handle common questions.
- Content saved/archived: Screenshot or download creator content as soon as it goes live. Stories disappear in 24 hours.
Running multiple campaigns at once? That complexity multiplies quickly. The guide on how to manage multiple influencer campaigns is practical reading before you try to juggle several at once.
Phase 7: Real-Time Performance Tracking
The days of waiting until a campaign ends to check results are over. In 2026, you should be seeing what’s working within 24–48 hours of launch — and adjusting accordingly.
7.1 Metrics That Actually Matter
Every campaign has different priority metrics depending on the goal. Here’s a cheat sheet:
| Campaign Goal | Primary Metrics | Secondary Metrics |
| Brand Awareness | Reach, Impressions, Story Views | Share of Voice, Brand Mentions |
| Engagement | Engagement Rate, Saves, Shares | Comment Sentiment, Profile Visits |
| Traffic | Link Clicks, Swipe-ups, UTM Sessions | Bounce Rate, Time on Site |
| Conversions | Promo Code Redemptions, Sales | ROAS, Cost Per Acquisition |
| App Installs | Install Rate, CPI (Cost per Install) | Day-7 Retention, In-App Activity |
7.2 How to Track Without Losing Your Mind
Manual tracking means copy-pasting numbers from Instagram Insights into spreadsheets. It works, but it’s slow, error-prone, and always a week behind.
A proper Instagram influencer analytics tool aggregates performance data across all your creators in one dashboard — so you can see who’s driving results and who isn’t, without a reporting spreadsheet nightmare.
If you’re still managing campaigns through spreadsheets and DMs, it’s worth reading about managing influencer campaigns without spreadsheets — the difference in time saved is significant.
7.3 Mid-Campaign Optimization
Real-time data is only useful if you’re willing to act on it. Here’s what mid-campaign optimization looks like in practice:
- Content is underperforming (low reach): Check if it was posted at a low-engagement time. Ask the creator if they can add it to their Stories to boost visibility.
- One creator is massively outperforming others: Consider putting paid amplification behind that content if you have usage rights.
- Comments are negative: Assess whether it’s a product issue, a messaging issue, or a creator fit issue. Have a response plan ready.
- Promo code isn’t converting: Check if the landing page is functioning. Verify the creator is driving traffic at all.
7.4 Tracking Checklist — Phase 7
- Tracking links live and verified: UTM parameters resolving correctly in analytics.
- Promo codes active and monitored: Daily redemption count being tracked.
- Creator content archived: All Stories saved within 24 hours of going live.
- Day 1–3 metrics reviewed: Initial reach, engagement, and click data reviewed and noted.
- Mid-campaign check done: Performance vs. KPI benchmarks reviewed at campaign midpoint.
- Amplification decision made: Top-performing content flagged for paid boost (if budget and usage rights allow).
For a more detailed methodology on performance measurement, the guide on how to track Instagram influencer campaign performance in real time covers this thoroughly.
Phase 8: Post-Campaign Reporting and Analysis
The final report is what justifies the next campaign budget. More importantly, it’s how you get smarter over time — understanding what actually moved the needle and what was just noise.
8.1 What Your Post-Campaign Report Should Include
| Report Section | What to Include |
| Campaign Overview | Goals, timeline, total creators, total spend, content volume |
| Reach and Impressions | Total unduplicated reach, total impressions, breakdown by creator and content type |
| Engagement Metrics | Total likes, comments, saves, shares; overall engagement rate vs. benchmark |
| Traffic and Conversions | Total link clicks, landing page sessions, conversion rate, revenue or installs (if tracked) |
| Creator Performance | Side-by-side comparison of each creator’s results and ROI |
| Content Performance | Top-performing post(s) with data; worst-performing with notes on why |
| Audience Insights | What the campaign data tells us about which audience segments responded best |
| Lessons Learned | What worked, what didn’t, what to do differently next time |
| Next Steps | Recommendation on which creators to rebook, budget adjustment for next campaign |
8.2 Calculating ROAS for Influencer Campaigns
Return on Ad Spend (ROAS) for influencer campaigns is straightforward in theory but requires clean tracking data:
ROAS = Total Revenue Attributable to Campaign / Total Campaign Spend
The hard part is ‘attributable’. Promo codes and UTM-tracked links give you direct attribution. For awareness-focused campaigns, you’ll need to use brand lift studies or look at organic search increases in your brand name around the campaign period.
8.3 Post-Campaign Checklist — Phase 8
- All content performance data collected: From creator analytics, UTM data, and promo code redemptions.
- Final metrics vs. KPI targets documented: Did you hit your goals? By how much?
- Top and bottom performers identified: With notes on context (audience size, content type, timing).
- ROAS or equivalent ROI calculated: Or brand lift noted for awareness campaigns.
- Creator feedback gathered: What was their experience? What would they suggest changing?
- Report shared with stakeholders: Finance, brand, and leadership all have the numbers they need.
- Creator rebooking decisions made: Who gets invited back for the next campaign?
- Content archived for future use: Top UGC stored for potential reuse (within agreed usage rights).
Phase 9: Compliance, Legal, and Brand Safety
This section doesn’t get enough attention until something goes wrong. In 2026, regulatory scrutiny on influencer advertising has increased in most major markets. Getting this right isn’t optional.
9.1 FTC and Global Disclosure Requirements
In the United States, the FTC requires clear and conspicuous disclosure of any material connection between a brand and a creator — including gifted products, not just paid partnerships. ‘#ad’ or ‘#sponsored’ at the start of the caption (not buried in a list of hashtags) is the standard.
Similar requirements exist in the UK (ASA), EU (GDPR + national advertising standards), and Australia (ACCC). If your campaign targets multiple markets, check the rules for each.
| Market | Regulator | Key Requirement |
| United States | FTC | Clear disclosure in caption; ‘#ad’ or ‘Paid partnership’ label required |
| United Kingdom | ASA / CAP | Must be upfront and obvious; ‘AD’ label required |
| European Union | National ASAs + DSA | Disclosure required; DSA adds platform accountability rules (2024+) |
| Australia | ACCC | Disclosure required; must be ‘clear and prominent’ |
| Canada | Competition Bureau | Material connection must be disclosed |
| India | ASCI | Disclosure of paid partnerships required; ASCI guidelines updated 2023 |
9.2 Brand Safety Protocol
- Creator content audit done pre-contract: Reviewed past six months of content.
- Campaign monitoring set up: Alerts for brand mentions, creator mentions during campaign period.
- Crisis response plan documented: What’s the process if a creator posts something problematic during the campaign?
- Content takedown clause in contract: Brand has the right to request content removal for specified reasons.
9.3 FTC / Compliance Checklist — Phase 9
- Disclosure requirements confirmed: For all target markets.
- Disclosure language in brief and contract: Not just verbal agreement.
- Creator content reviewed for compliance: Before it goes live.
- Disclosures verified in published content: ‘#ad’ visible and upfront in all posts.
- Campaign records archived: Contracts, briefs, approved content, performance reports — kept for minimum 3 years.
Phase 10: Relationship Management and Long-Term Strategy
The brands that win at influencer marketing aren’t the ones that run one great campaign. They’re the ones who build genuine relationships with creators over time — and those relationships compound.
10.1 Treat Creators Like Partners, Not Vendors
A creator who genuinely likes your brand will promote it differently than one who’s just completing a contract deliverable. That difference shows in the content, and their audience can feel it.
After a campaign ends: send a thank you (a real one, not an automated email), share the campaign results with the creator, ask for their feedback, and follow their content organically. When you approach them again six months later, you’re not starting from scratch.
10.2 Build a Creator Roster for Repeat Campaigns
Rather than running every campaign with a new set of creators, consider maintaining a roster of 10–30 creators you’ve worked with and trust. Repeat collaborations:
- Cost less in discovery and vetting time.
- Produce more authentic content — the creator knows the brand.
- Build stronger audience association over time.
- Reduce contract negotiation friction.
Managing a roster of ongoing creator relationships goes beyond a spreadsheet. This is where a proper influencer management platform pays for itself — especially when you’re managing 20+ relationships simultaneously.
10.3 Scaling: When to Bring in External Support
At some point, the campaigns get too large or too numerous to manage entirely in-house. Signs you’ve hit that point:
- You’re running more than three campaigns simultaneously.
- Creator outreach is taking more than 20 hours per week.
- Reporting takes multiple days to compile.
- Campaign performance is inconsistent and you don’t know why.
At that stage, you’re looking at either agency support for influencer campaign management or a platform like Hyperr Manage that centralizes the entire workflow.
For smaller brands earlier in the process, influencer marketing tools designed for small brands offer most of the capabilities without enterprise pricing.
10.4 Long-Term Strategy Checklist — Phase 10
- Creator feedback collected: Post-campaign debrief done for each creator.
- Performance notes logged: For future reference when deciding on rebooking.
- Thank-you sent: Personal acknowledgment, not just automated.
- Creator roster updated: Top performers tagged for future outreach priority.
- Annual influencer strategy reviewed: Goals, budget allocation, and creator mix reviewed quarterly.
The Master Campaign Checklist: Print and Use This
Here’s everything condensed into one printable checklist. Use it for every campaign — ideally in a project management tool or a dedicated campaign platform.
| Phase | Key Tasks | Owner | Status |
| 1. Strategy | Define goal, set KPIs, build budget, draft timeline | Campaign Lead | |
| 2. Creator Discovery | Write creator profile, discover candidates, vet and shortlist | Influencer Manager | |
| 3. Outreach & Contracts | Personalize outreach, negotiate, sign contracts, process deposit | Influencer Manager / Legal | |
| 4. Briefing | Write brief, internal review, send to creators, confirm receipt | Creative / Campaign Lead | |
| 5. Content Review | Review submissions, request revisions, final approval in writing | Brand / Campaign Lead | |
| 6. Launch | Confirm go-live times, verify tracking, activate monitoring | Campaign Lead | |
| 7. Tracking | Monitor daily metrics, mid-campaign review, optimize if needed | Analytics / Campaign Lead | |
| 8. Reporting | Collect all data, calculate ROAS, write report, share internally | Analytics | |
| 9. Compliance | Verify disclosures, archive records, brand safety check | Legal / Campaign Lead | |
| 10. Relationships | Creator debrief, thank-you, roster update, lessons documented | Campaign Lead |
Tools and Platforms Worth Knowing in 2026
Running a campaign well in 2026 means having the right tools for each phase. Here’s a practical breakdown of what different tool categories cover:
| Tool Category | What It Does | When You Need It |
| Creator Discovery | Search databases by niche, location, engagement rate, audience demographics | Phase 2 |
| Audience Analytics | Verify creator audience authenticity, demographics, credibility scores | Phase 2 |
| Contract Management | Digital signing, template library, approval tracking | Phase 3 |
| Brief & Content Management | Centralize brief delivery, content submission, and revision rounds | Phases 4–5 |
| Campaign Dashboard | Real-time metrics across all creators in one view | Phases 6–7 |
| UTM & Link Tracking | Attribution from influencer traffic to conversions | Phases 6–7 |
| Reporting & Analytics | Automated report generation, ROAS calculation, competitor benchmarking | Phase 8 |
| CRM for Creators | Manage long-term relationships, notes, history, contact info | Phase 10 |
If you want to understand how influencer marketing works at a fundamental level before choosing tools, that’s the right starting point. Once you’re clear on the mechanics, tools make more sense in context.
Frequently Asked Questions
How many influencers should I work with per campaign?
It depends on your budget and goal. For awareness campaigns, working with 5–10 micro influencers often produces better aggregate reach and engagement than one macro, at a similar cost. For conversion campaigns, start with 3–5 creators with proven track records in your category, test, and scale what works.
What’s a good engagement rate benchmark for Instagram in 2026?
Benchmarks vary by tier. Nano influencers (under 10K) typically average 5–8% engagement. Micro (10K–100K) average 2–5%. Mid-tier (100K–500K) average 1–3%. Macro and above average under 1.5%. Any creator significantly below these benchmarks warrants additional scrutiny.
How far in advance should I start campaign planning?
For a standard campaign, allow 6–8 weeks from strategy sign-off to launch. This covers: 1–2 weeks for creator discovery and outreach, 1 week for negotiation and contracting, 2 weeks for content creation, 1 week for review and approval. Campaigns with complex creative requirements or a large creator roster need more time.
Do I need a contract for gifted product collaborations?
Yes — always. Even if there’s no payment, a gifted collaboration has obligations around disclosure, content approval, and usage rights. A simple one-page agreement protects both parties. ‘No contract’ situations create ambiguity about whether the creator is required to post at all.
What’s the difference between an influencer marketing tool and an influencer marketing platform?
There’s overlap, but generally: a tool tends to handle a specific workflow (discovery, tracking, etc.) while a platform is an end-to-end system that manages the entire campaign lifecycle. Smaller brands often start with a tool. Agencies and larger brands typically need a platform.
How do I handle a creator who misses their posting deadline?
Your contract should include a deadline and a kill fee clause. In practice: send a reminder 48 hours before the deadline, follow up on the deadline day, and if they miss it by more than 48 hours, initiate the conversation about either a revised posting date or invoking the kill fee. Don’t let delays slide without documentation.
Final Thoughts
There’s a gap between brands that run campaigns and brands that manage them. Running is reactive — you set things in motion and hope they work. Managing is proactive — you have a system, you check against it at every phase, and you make informed decisions throughout.
This checklist is the system. It won’t make bad products good or force a creator to post on time. But it will make sure you didn’t miss something obvious — and that when a campaign performs well, you know exactly why, so you can replicate it.
The best influencer marketers in 2026 aren’t the ones with the biggest budgets or the most followers in their rolodex. They’re the ones who treat every campaign as an opportunity to learn — and who have the documentation to actually do it.
Whether you’re just starting out or looking to professionalize an existing operation, the combination of a clear process and the right tools makes the difference. If you haven’t yet explored what a dedicated influencer campaign management tool can do for your workflow — or what Hyperr Manage offers specifically — it’s worth your time.
About This Guide
This guide was written in March 2026 to reflect current best practices in Instagram influencer marketing. Regulatory guidance (FTC, ASA, DSA) is accurate as of early 2026 — always verify current requirements for your specific market. Pricing benchmarks are estimates based on industry reports and should be used for planning purposes only, as actual rates vary significantly by creator, niche, and demand.